A heat pump can look compact on a product page, yet its outdoor unit needs more than a small patch of ground. Air must move freely across the coil. Installers also need room to reach service panels, and snow, leaves, fences, or a nearby wall can interfere with operation. The exact clearances vary by model, so the manufacturer’s installation manual should guide the final layout. A tape measure and a quick site walk can prevent an expensive adjustment later.
What are the space requirements for an outdoor heat pump unit? The answer depends on the unit, its airflow pattern, and the site. HVAC educator Bryan Orr often emphasizes practical installation conditions; a concise paraphrase of that principle is: “Give the equipment clear airflow and accessible service space.” Treat that as a starting point, not a substitute for model-specific instructions. A narrow side yard may seem convenient, but a fence can block discharge air or make maintenance awkward. Roof overhangs, bedroom windows, and property boundaries deserve attention, too.
This guide’s seven tips look beyond the unit’s footprint. They cover side and rear clearances, overhead space, airflow direction, service access, noise, drainage, and seasonal obstructions. Small details matter. A downspout dripping onto the base, for example, can create ice in cold weather. Some sites still require a compromise; document it, check the manual, and ask a qualified installer to assess the layout before setting the pad. Clearances are not decorative numbers. They help the system breathe, operate reliably, and remain serviceable.
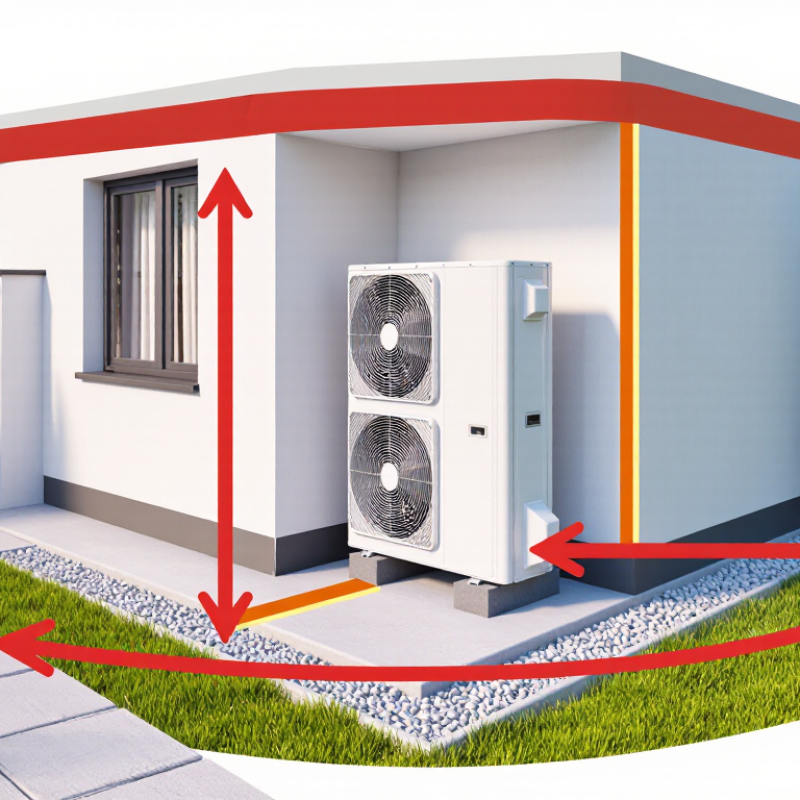
Outdoor heat pump space requirements depend on airflow, service access, and the conditions around the unit.
An outdoor unit needs clear space so it can draw in air and release it without obstruction. Follow the clearance distances in the installation instructions; they vary by equipment and placement. Air needs room. A fence, wall, or dense hedge placed too close may restrict airflow or allow cold exhaust air to circulate back toward the unit. Keep leaves, tall grass, and stored items away from the intake and outlet. A neat hedge can still be a mistake.
Consider the site through every season. Snow can bury a low-mounted unit, while roof runoff may create ice near its base. Ask a qualified installer whether the proposed location and mounting height suit local weather and the specific equipment. Leave enough space for a technician to open panels and work safely, rather than squeezing the unit into a narrow corner. Think about sound, too: a hard wall can reflect operating noise toward a bedroom or patio. The best-looking spot may not be the best-performing one. Before installation, check clearances, airflow direction, drainage, and access on site; a quick measurement can prevent a costly relocation.
Before placing an outdoor heat pump, compare the exact model’s installation manual with locally adopted codes and permit conditions. Clearances are not universal. Intake sides, discharge direction, and service panels may each have different minimums. Measure from the reference points shown in the manual, not from a generic online diagram. Air needs room. Check nearby windows, doors, property boundaries, and local noise or placement rules with the permitting office. Requirements vary by jurisdiction.
The International Energy Agency’s 2022 report, The Future of Heat Pumps, says heat pumps can be three to five times more energy-efficient than gas boilers. That advantage does not make blocked airflow harmless. Keep shrubs, fences, storage bins, and drifting snow outside the specified intake and discharge zones. Leave room for coil cleaning and repairs, too. Photograph the proposed location and record each measured gap before installation. A tidy sketch can still miss a gutter or a fence planned for next year.
7 Tips for Outdoor Heat Pump Space Requirements
Planning Airflow Around the Outdoor Unit
Air needs a clear route into and out of the outdoor unit. A fence, wall, or thick hedge can trap discharged air and make the unit work harder. Keep leaves, grass clippings, and snow away from the coil and fan. A tidy corner is not always a good location. Check the installation manual for exact clearances; they vary by equipment and should not be guessed.
The U.S. Department of Energy’s Energy Saver guidance says heat pumps can use up to 75% less electricity for heating than electric resistance systems. That potential depends on the system and conditions, so blocked airflow is worth preventing. Leave room to clean the coil and reach service panels, too. In snowy areas, raise the unit above expected drift depth without enclosing it. The Northeast Energy Efficiency Partnerships’ cold-climate heat pump guidance also stresses keeping outdoor units clear of snow and debris. Measure the space before installation. I would still recheck it after shrubs grow; that detail is easy to miss.
Planning airflow around the outdoor unit starts with keeping its intake and discharge paths clear. The chart shows example clearance distances commonly used as planning starting points, not universal minimums.
Keep plants, fences, stored items, and snow away from airflow openings. Required clearances vary by unit and installation; always follow the installation manual and local requirements.
An outdoor heat pump needs open space to move air, not just a clear patch beneath it. Keep leaves, grass clippings, and stored items away from the coil and fan outlet. Air needs room. Wet leaves cling to coil fins, while a nearby fence can send discharged air back toward the unit. That recirculation may reduce heat transfer and make the system work harder. Exact clearances vary by equipment and installation, so follow the unit’s installation instructions rather than relying on a one-size-fits-all measurement.
The U.S. Department of Energy’s Energy Saver guidance estimates that heat pumps can reduce heating electricity use by about 50% compared with electric resistance heating. That benefit depends on proper operation; blocked airflow is an avoidable obstacle.
Trim shrubs before branches reach the cabinet, and check after windy weather or snowfall. Keep the top clear, too. A clean-looking yard can still hide a problem: grass can grow into the coil, and a storage bin may sit directly in the fan’s airflow. It is tempting to push the unit close to a wall to save space. Don’t guess. Leave the clearances specified by the installer’s documentation, and inspect the area again as plants grow.
Outdoor space is not only about airflow; it is also a working area for inspection and seasonal maintenance. Keep the service side accessible so a technician can remove panels, check wiring, and clean the coil without moving fences or stored items. Exact clearances vary by unit, so follow its installation instructions rather than relying on a generic measurement. Access matters.
The U.S. Department of Energy’s Energy Saver guidance says heat pumps can use about 50% less electricity for heating than electric resistance systems. That efficiency depends on correct operation, and restricted access can make routine checks harder.
Leave room to clear leaves, rinse debris from the coil, and inspect drainage after winter. Keep it clear. Snow can drift against the cabinet, so plan for removal without blocking the discharge area.
A practical check: can a service worker reach the access panel with tools and work safely? It is easy to underestimate how much room a small fence or bin takes. I would rather allow extra space now than discover a maintenance problem in freezing weather.
It needs room to draw in air and release it. Nearby walls, fences, or dense hedges can disrupt airflow.
Check the exact model’s installation instructions. Intake, discharge, and service sides may require different distances. Generic measurements can mislead.
Only if the required clearances remain open. Keep leaves, tall grass, and stored items away from the intake and outlet.
Leave access to panels and enough working room for tools. A narrow corner may turn a simple repair into a problem.
Snow can bury a low-mounted unit, and roof runoff can freeze near its base. Ask an installer about local weather and mounting height.
Yes. A hard wall may reflect operating noise toward a bedroom or patio. A quiet-looking corner may not be ideal.
Measure gaps from the reference points shown in the manual. Check airflow, drainage, service access, nearby openings, and boundaries. Take photos, too.
Yes. A new fence, bin, or hedge can block airflow later. I might still overlook something planned for next year.
Planning the right location for an outdoor heat pump helps it operate efficiently and remain accessible over time. What are the space requirements for an outdoor heat pump unit? The answer depends on the unit’s design, the manufacturer’s instructions, and applicable local codes, so check those requirements before choosing a final position. Leave enough open space around the unit for air to enter and exit without restriction, and avoid placing it where walls, fences, or other nearby structures could disrupt airflow.
Keep the area clear of plants, stored items, leaves, snow, and other debris that could block vents or collect around the equipment. Also allow room for a technician to reach panels and components during inspection or repair. A little extra space can make seasonal cleaning and maintenance easier, reduce the chance of airflow problems, and help the heat pump provide dependable performance throughout the year.

Retro Pumps